How to Put on Nail Polish A Step-by-Step Guide
Preparing Your Nails for a Perfect Manicure
How to put on nail polish – Proper nail preparation is crucial for a long-lasting and beautiful manicure. Clean, dry nails ensure optimal polish adhesion, preventing chipping and smudging. Shaping and buffing your nails creates a smooth surface for even polish application.
Nail Shaping and Buffing
Start by gently pushing back your cuticles with a cuticle pusher. Avoid cutting your cuticles, as this can lead to infection. Use a nail file to shape your nails to your desired length and shape. File in one direction to prevent splitting or weakening the nails. Finally, use a buffer to smooth the nail surface, removing any ridges or imperfections.
This creates a smooth base for better polish adhesion and a more professional-looking finish.
Essential Manicure Tools
| Tool | Use | Special Considerations |
|---|---|---|
| Nail File | Shapes and smooths the edges of the nails. | Use a fine-grit file to avoid damaging the nails. File in one direction. |
| Buffer | Smooths the nail surface, removing ridges and imperfections. | Use gently to avoid thinning the nails. |
| Cuticle Pusher | Gently pushes back the cuticles. | Avoid cutting or aggressively pushing the cuticles. |
Applying the Base Coat: How To Put On Nail Polish
A base coat is essential for protecting your nails from staining and discoloration caused by pigmented nail polishes. It also helps the polish adhere better, resulting in a longer-lasting manicure. A thin, even layer is key to preventing a bumpy finish.
Base Coat Application Technique
Apply a thin layer of base coat, starting from the base of your nail and moving towards the tip. Avoid applying polish to your cuticles or skin, as this can lead to smudging and chipping. Let the base coat dry completely before applying the colored polish.
Applying Nail Polish
The key to a flawless manicure lies in the application technique. Holding the brush correctly and applying even strokes will minimize streaks and create a smooth, even finish. Multiple thin coats are always preferable to one thick coat, which is more prone to chipping and smudging.
Step-by-Step Nail Polish Application
- Apply the first coat of polish, starting from the base of the nail and working your way to the tip in three even strokes: one down the center, and one on each side.
- Allow the first coat to dry completely (approximately 2-3 minutes).
- Apply a second coat of polish using the same technique. This will provide richer color and more even coverage.
- Allow the second coat to dry completely (approximately 2-3 minutes).
- (Optional) Apply a third coat for extra color intensity and longevity. Again, allow to dry completely.
Applying the Top Coat
A top coat seals in the color, adds shine, and significantly increases the longevity of your manicure. It protects the polish from chipping and wear, ensuring your manicure stays looking fresh for longer.
Top Coat Application and Types
Apply a thin, even layer of top coat, just like you did with the base coat and colored polish. Avoid applying too much, as this can cause the top coat to become sticky or uneven. Let it dry completely.
Types of Top Coats

Source: entirewiki.com
| Top Coat Type | Advantages | Disadvantages |
|---|---|---|
| Quick-Drying Top Coat | Reduces drying time. | May not provide as much shine or durability as other types. |
| High-Shine Top Coat | Provides a glossy, high-shine finish. | May take longer to dry. |
| Strengthening Top Coat | Helps strengthen and protect nails. | May not offer as much shine as other types. |
Cleaning Up Mistakes
Even the most experienced manicurists make mistakes. Knowing how to clean up excess polish and fix common application errors is essential for a flawless finish. A small brush dipped in nail polish remover is your best friend for achieving clean lines.
Fixing Manicure Mistakes
- Use a small brush dipped in nail polish remover to carefully clean up any excess polish that has spilled onto your skin.
- For smudges, gently wipe them away with a cotton swab dipped in nail polish remover. If the smudge is significant, you might need to carefully remove and reapply the polish to that nail.
- If a coat is uneven, allow it to dry completely, then apply another thin coat to even out the finish.
Preventing Manicure Mistakes
- Work in a well-lit area.
- Use thin coats of polish to prevent smudging.
- Allow each coat to dry completely before applying the next.
- Apply a thin layer of cuticle oil after the manicure to keep cuticles moisturized and prevent chipping.
Nail Polish Removal
Proper nail polish removal is important to prevent damage to your nails. Using an acetone-based remover and cotton pads is generally the most effective method. Gentle removal techniques will help protect your nails from dryness and breakage.
Safe Nail Polish Removal, How to put on nail polish
Saturate a cotton pad with acetone-based nail polish remover. Hold it firmly against your nail for a few seconds to soften the polish. Gently wipe away the polish, working from the base of the nail to the tip. Avoid harsh scrubbing, as this can damage your nails. After removing the polish, apply a moisturizing cuticle oil to hydrate your nails and cuticles.
Different Nail Polish Types
Various nail polish formulations offer different benefits and drawbacks. Understanding the differences between gel, regular, and acrylic polishes will help you choose the best option for your needs and preferences.
Types of Nail Polish
| Type | Advantages | Disadvantages |
|---|---|---|
| Regular Nail Polish | Easy to apply and remove, widely available in various colors and finishes. | Less durable, prone to chipping and smudging, shorter lasting. |
| Gel Nail Polish | Long-lasting, durable, resistant to chipping and smudging. | Requires a UV or LED lamp for curing, more difficult to remove, potentially damaging to nails with overuse. |
| Acrylic Nail Polish | Provides strength and length to nails, durable, can be shaped and decorated in various ways. | Requires professional application and removal, can damage natural nails with overuse or improper application. |
Illustrative Examples: Classic Manicures
Classic Red Manicure

Source: bigstockphoto.com
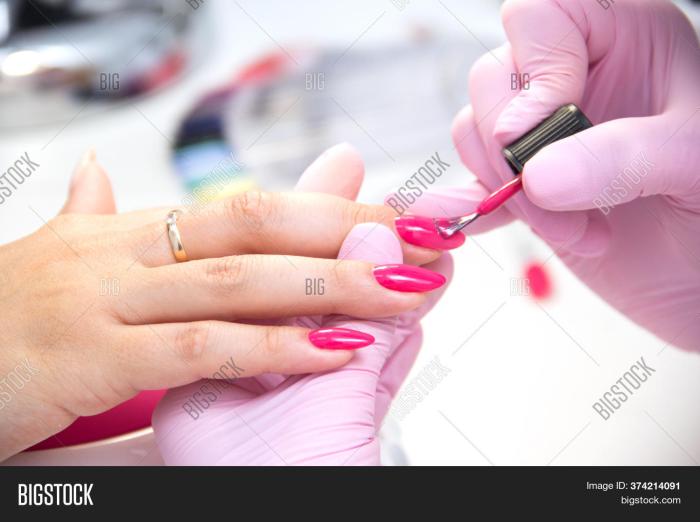
A classic red manicure exudes timeless elegance. A deep crimson red, such as a creamy, opaque shade, offers a rich and sophisticated look. The application technique follows the steps Artikeld above, focusing on achieving a smooth, even finish. The final result should be a glossy, even coat of red polish with a subtle shine, emphasizing the color’s depth and richness.
French Manicure
The French manicure is a classic choice for its clean, elegant look. It involves painting the nail bed with a pale pink or nude shade and then applying a white tip to the free edge of the nail. The white tip should be a crisp, clean line, and the overall finish should be smooth and polished with a subtle shine.
Precise application is key to achieving this classic look.
Popular Questions
Can I use regular nail polish remover on gel polish?
No, you need a special acetone-based remover designed for gel polish. Regular remover won’t effectively remove gel.
How long should I wait between coats of polish?
Allow each coat to dry completely before applying the next. This usually takes about 2-3 minutes, but it depends on the type of polish.
What’s the best way to prevent bubbles in my nail polish?
Achieving a perfect manicure involves careful application of nail polish, ensuring even coats and avoiding smudges. However, if you’re working with gel polish, the removal process requires a different approach; you’ll need to know what to use to remove gel nail polish to prevent damage to your natural nails. Once removed, you can then return to the satisfying process of applying your favorite nail polish shades and creating stunning nail art.
Apply thin coats, avoid shaking the bottle (roll it instead), and let each coat dry completely before applying the next. Also, make sure your nails are clean and dry.
How can I make my manicure last longer?
Use a good quality base and top coat, apply thin coats, and avoid prolonged exposure to water.


