How to Remove Acrylic Nails and Gel Polish
Safe Removal of Acrylic Nails
How to remove acrylic nails and gel polish – Improper acrylic nail removal can lead to significant damage to your natural nails, including thinning, peeling, and infections. This section details a safe and effective method for removing acrylic nails at home, minimizing the risk of damage.
Dangers of Improper Acrylic Nail Removal
Removing acrylics incorrectly, such as forcefully peeling or prying them off, can severely damage the nail bed. This can result in painful lifting of the nail plate, infections, and long-term nail health issues. Using harsh chemicals without proper technique can also cause significant damage.
Necessary Tools and Materials for Safe Acrylic Removal
Gathering the right tools is crucial for a successful and safe removal. You’ll need the following:
- 100% pure acetone
- Cotton balls or pads
- Aluminum foil
- Nail file or buffer (to gently file the top layer of the acrylic)
- Cuticle pusher (optional, for gently pushing back cuticles)
- Nail clippers (to shorten the length of the acrylic nails)
- Cuticle oil
- Moisturizing hand cream
Step-by-Step Guide for Soaking Off Acrylic Nails Using Acetone

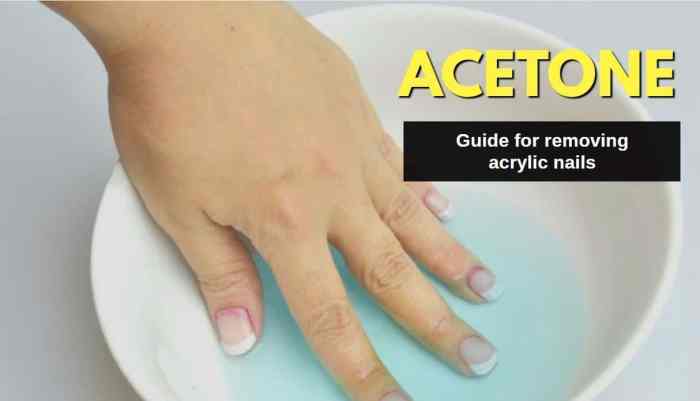
Source: bestacrylicnails.com
- Gently file the top surface of the acrylic nails to create a rough surface for better acetone penetration. Avoid aggressive filing that could damage your natural nail.
- Cut the acrylic nails to a shorter length using nail clippers. This will reduce the soaking time.
- Saturate a cotton ball or pad with acetone. Place it on top of each acrylic nail.
- Wrap each fingertip tightly with aluminum foil to seal in the acetone and create a warm, moist environment to help break down the acrylic.
- Let the acetone soak for 15-20 minutes, or until the acrylic begins to soften. You may need to re-apply acetone if it dries out.
- Gently push and peel off the softened acrylic using a cuticle pusher. Avoid pulling or forcing the acrylic off, as this can damage your natural nail.
- Once all the acrylic is removed, gently buff away any remaining residue with a nail buffer. Avoid excessive buffing.
- Apply cuticle oil and a moisturizing hand cream to nourish and hydrate your nails.
Tips for Minimizing Damage to Natural Nails During Removal

Source: wonderhowto.com
To protect your natural nails, ensure the acetone is 100% pure. Avoid excessive filing and pulling. Take your time and be patient during the removal process. Regularly moisturize your nails to maintain their health.
Comparison of Acetone-Based Removal Methods
Different methods exist for acetone-based acrylic removal. Here’s a comparison:
| Method | Time Required | Effectiveness | Potential for Damage |
|---|---|---|---|
| Soaking (with foil) | 15-20 minutes | High | Low, if done carefully |
| Acetone Wraps | 15-20 minutes | High | Low, if done carefully |
Removing Gel Polish: How To Remove Acrylic Nails And Gel Polish
Gel polish, unlike acrylic nails, is a type of nail polish that requires a UV or LED light to cure. Removal requires different techniques, often involving either an e-file or acetone.
Differences Between Gel Polish and Acrylic Nails
Acrylic nails are a sculpted enhancement made from a powder and liquid monomer mixture, creating a hard, durable layer. Gel polish is a type of nail color applied in thin layers and cured under a UV or LED lamp. Acrylics require soaking in acetone for removal, while gel polish can be removed with acetone or an e-file.
Removing Gel Polish Using an E-File
Using an e-file requires professional training and skill. Improper use can cause serious damage to the natural nail. This method involves carefully filing away the gel polish layer by layer. It’s generally faster than the acetone soak method but requires precision and expertise to avoid damaging the natural nail.
Step-by-Step Guide for Removing Gel Polish with Acetone
- Buff the top layer of the gel polish to create a rough surface.
- Saturate a cotton pad with acetone and place it on each nail.
- Wrap each fingertip tightly with aluminum foil.
- Let it soak for 10-15 minutes.
- Gently push and scrape off the softened gel polish with a cuticle pusher or orangewood stick.
- Apply cuticle oil and moisturizer.
Proper Filing Techniques to Avoid Damaging the Natural Nail
When using an e-file, use a low speed and light pressure. Keep the e-file moving constantly to avoid overheating the nail. Focus on removing the gel polish without digging into the natural nail.
Flowchart for Safe Gel Polish Removal
A visual flowchart would clearly illustrate the steps: Start with buffing, then acetone soak, followed by gentle removal with a pusher, and finally, application of cuticle oil and moisturizer.
Nail Preparation and Aftercare
Proper aftercare is essential for healthy nail growth after removing acrylics or gel polish. This section highlights crucial steps to promote nail health and prevent common problems.
Common Nail Problems After Removal
Common issues include dryness, brittleness, thinning, and discoloration. Infections can also occur if the removal process was not properly executed.
Tips for Moisturizing and Strengthening Natural Nails, How to remove acrylic nails and gel polish
Regularly apply cuticle oil and moisturizer to keep nails hydrated and prevent breakage. Consider using nail strengthening products containing ingredients like keratin or biotin.
Importance of Cuticle Care
Healthy cuticles protect the nail matrix, the area where nail growth originates. Gently push back cuticles with a cuticle pusher and avoid cutting them. Apply cuticle oil to keep them hydrated and prevent dryness and cracking.
Nail Strengthening Products and Treatments
Many nail strengthening products are available, containing ingredients like biotin, keratin, and calcium. Professional treatments like nail wraps or bonding treatments can also be considered for severely damaged nails.
Dos and Don’ts for Post-Removal Nail Care
- Do: Moisturize regularly, apply cuticle oil, use a strengthening treatment, avoid harsh chemicals.
- Don’t: Pick or peel at your nails, use harsh nail polish removers, expose your nails to excessive water.
Comparing Removal Methods
Both acetone soaking and e-file methods have advantages and disadvantages for removing acrylics and gel polish. This section compares the two, considering factors such as time, cost, and potential for damage.
Acetone Soak vs. E-File: A Comparison
Acetone soaking is generally safer for at-home removal but takes longer. E-file removal is faster but requires professional skill and carries a higher risk of damage if not done correctly. The best method depends on individual nail condition and experience.
Advantages and Disadvantages of Each Method
Acetone Soak: Advantages include safety and ease of use at home. Disadvantages include longer processing time and potential for incomplete removal. E-File: Advantages include speed and precision when done by a professional. Disadvantages include risk of damage to the natural nail if not done correctly and higher cost.
Time Required for Each Method
Acetone soaking for acrylics typically takes 15-20 minutes, while gel polish removal takes 10-15 minutes. E-file removal is significantly faster, usually taking 5-10 minutes for both acrylics and gel polish, depending on the thickness.
Best Method for Different Nail Types and Conditions

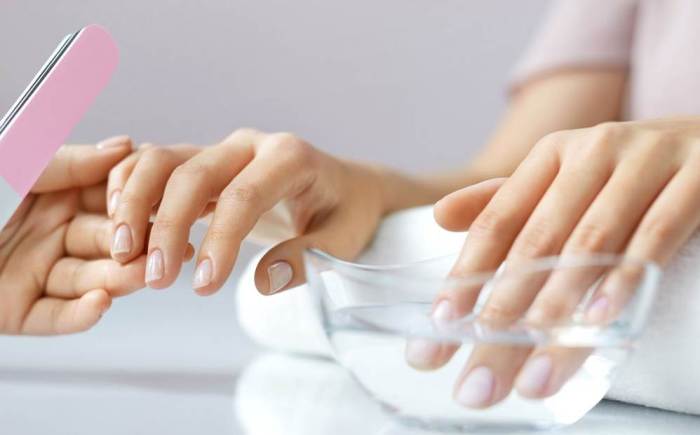
Source: fancynailart.com
For healthy nails and at-home removal, the acetone soak is safer. For thick acrylics or severely damaged nails, professional e-file removal might be necessary.
Cost-Effectiveness of Each Method
| Method | Cost of Materials | Cost of Professional Service (if applicable) |
|---|---|---|
| Acetone Soak | Low (acetone, cotton, foil) | N/A |
| E-File | High (if purchasing an e-file), otherwise low (if professional service is used) | Moderate to High |
Visual Aids: Illustrating the Process
Visual observation plays a crucial role in assessing nail health throughout the removal process. This section describes the visual changes in nails during and after removal.
Appearance of Healthy Nails Before and After Removal
Healthy nails before removal are smooth, even in color, and free from damage. After proper removal, nails should appear slightly softer but still intact, with no lifting or discoloration. Proper hydration is key to maintaining a healthy appearance.
Step-by-Step Visual Changes During Removal
For acrylics, the initial visual change during soaking is a slight softening of the acrylic. As the soaking progresses, the acrylic becomes more pliable and easier to remove. For gel polish, the initial buffing will create a slightly rough surface. After soaking, the gel polish will soften and lift off easily. Throughout the process, watch for signs of damage to the underlying natural nail.
Visual Differences Between Properly and Improperly Removed Nails
Properly removed nails will appear smooth, even, and free from damage. Improperly removed nails might exhibit lifting, peeling, thinning, or discoloration. Significant damage might require professional intervention.
Visual Indicators of Nail Damage
Visual indicators of nail damage include thinning of the nail plate, visible ridges or grooves, peeling or splitting of the nail, discoloration (yellowing or darkening), and noticeable lifting of the nail from the nail bed.
FAQ
Can I remove acrylics and gel polish at home?
Yes, but it’s crucial to follow proper techniques to avoid damaging your natural nails. This guide provides detailed instructions for safe at-home removal.
How long does it take to remove acrylic nails?
Removal time varies depending on the method (soaking vs. e-file) and the thickness of the acrylic. Soaking can take 30-60 minutes or more, while e-filing is generally quicker.
What if my natural nails are thin or weak?
If you have thin or weak nails, the acetone soak method is generally gentler. Consider using a nail strengthener after removal.
What are the signs of nail damage after removal?
Signs of damage include thinning, peeling, discoloration, or increased sensitivity. If you notice significant damage, consult a nail technician.


